Contributors: Jellejurre, JustSleightly
Animation Clips
Creating An Animation Clip
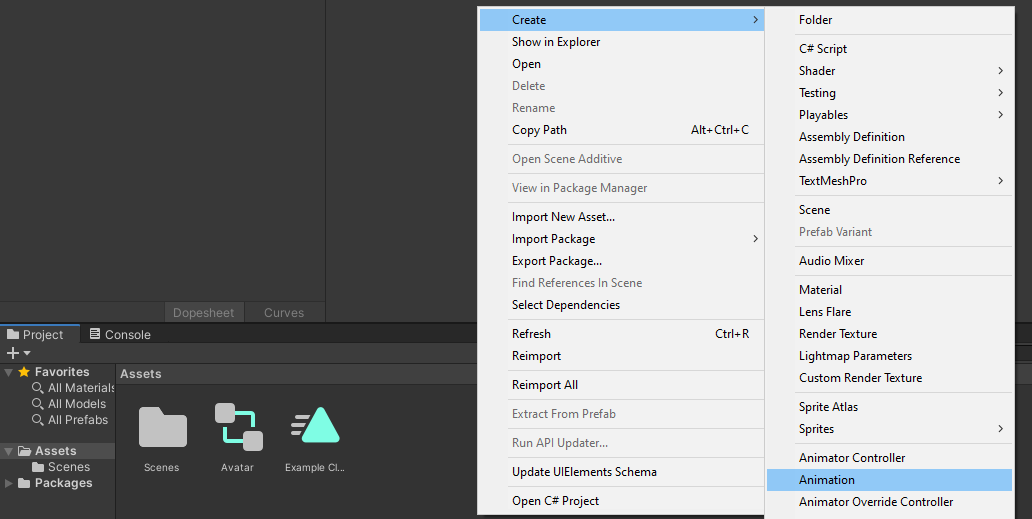
Animation Clips are asset files that end in file extension .anim and can be created in a number of ways:
Right-Clickin your Project window and Create an Animation Clip from the Context Menu.
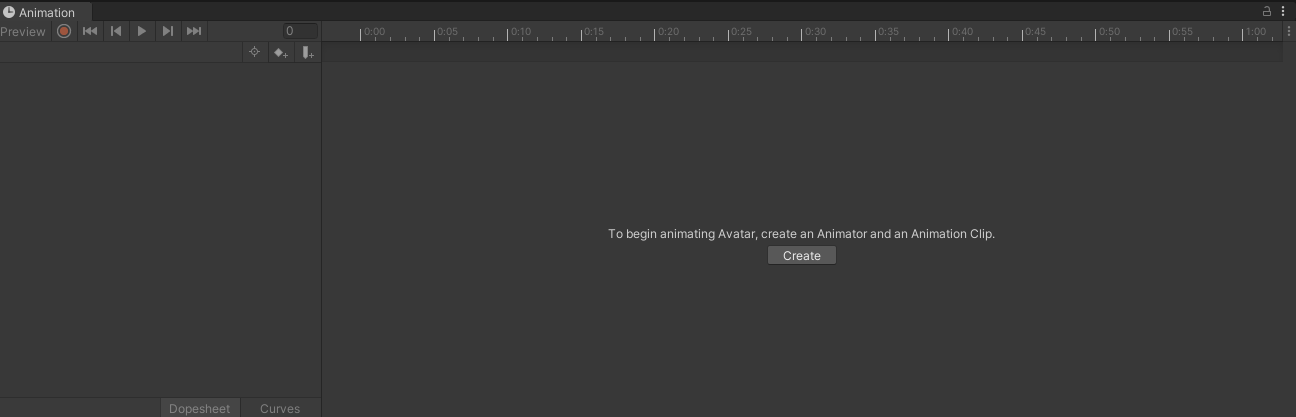
- Click Create from the Animation window if this option is available. See Animators for details on when this option appears. Select a Name and File Path for the new clip.
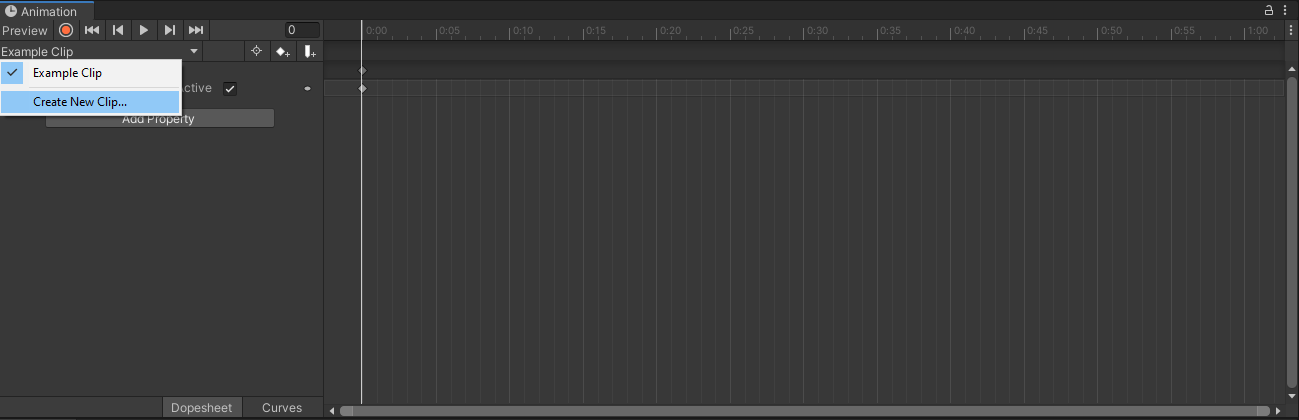
- Click Create New Clip from the Animation Clip Name dropdown in the Animation window if this option is available. See Animators for details on when this option appears. Select a Name and File Path for the new clip.
Opening the Animation Window
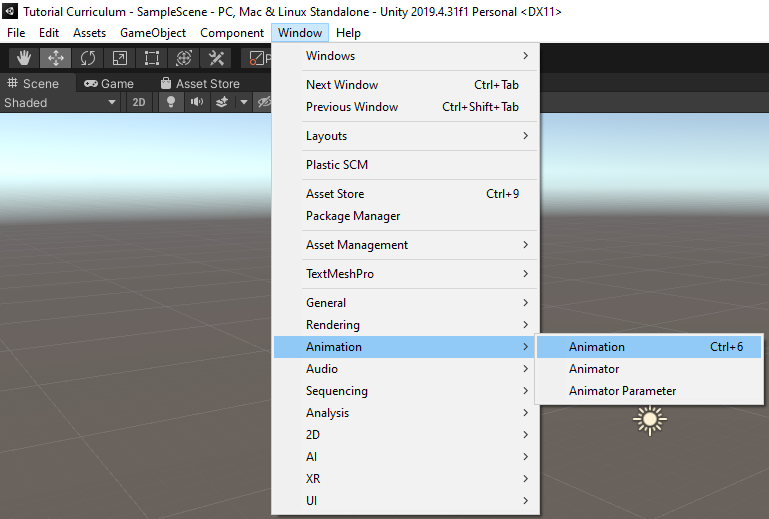
The Animation window can be opened via any of the following methods:
- Open from the top toolbar Window → Animation → Animation
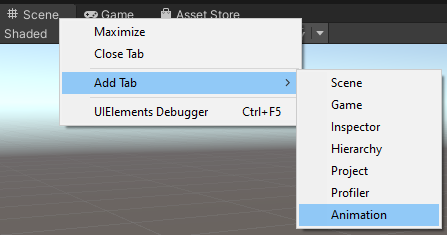
- Right click any other window and Add Tab → Animation
- Keyboard Shortcut
Ctrl + 6 Double-Clickany existing Animation Clip
Navigating the Animation Window
Navigation Bar
Record Mode vs Preview Mode
There are two distinct methods you can use to animate GameObjects in the Animation window: Record Mode and Preview Mode.
![]()
In Record mode, Unity automatically creates keyframes at the playback head when modifying any animatable property. Press the button with the red circle to enable record mode.
The Animation window time line is tinted red when in record mode.
![]()
In Preview mode, modifying your animated GameObject does not automatically create keyframes. Press the Preview button to enable preview mode.
The Animation window time line is tinted blue when in preview mode.
Note: In record mode, the Preview button is also active, because you are previewing the existing animation and recording new keyframes at the same time.
Lock Window
![]()
You can lock the Animation window so that it does not switch while you’re still able to select and manipulate other GameObjects in the Scene.
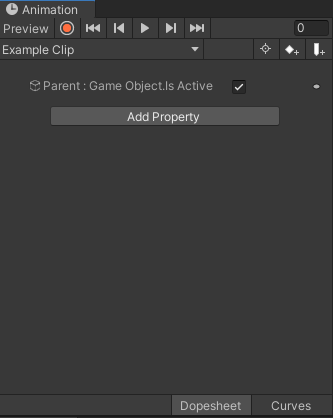
Animated Properties List
The left side of the Animation window is a list of the animated properties.
It starts empty, and will display animated properties added in the format of Object : Property.
Each property may have a foldout to reveal the exact values recorded at each keyframe.
The Object paths are relative to the clip’s Animator and will animate nothing if the path is invalid.
Selecting a property and pressing F2 will edit the Object path.
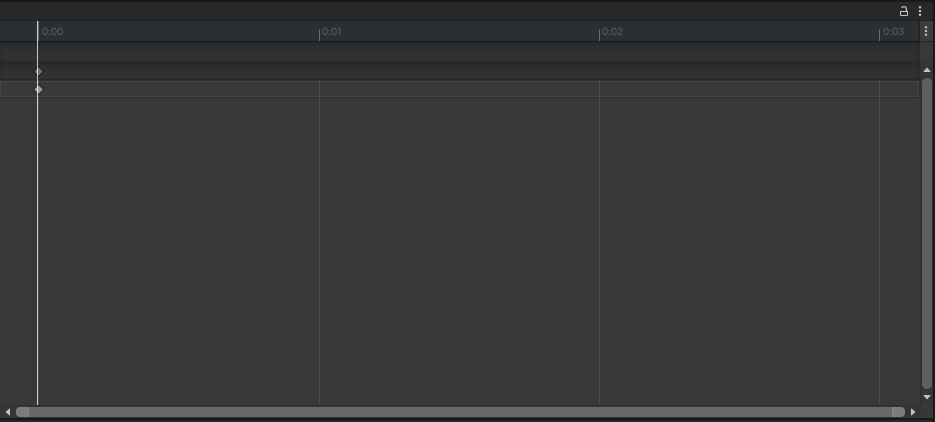
Animation Timeline
The right side of the Animation window is the timeline for the current clip.
- Diamond symbols are Keyframes
- The white line is called the Playback Head and can be moved by clicking on the timeline directly
- Animation Property Values reflect the current value at the current frame of the Playback Head
- Animation Timeline is measured in Seconds:Frames with a default Sample Rate of 60 Frames per Second
Dopesheet Mode vs Curves Mode
- Dopesheet mode offers a more compact, simple overview of the keyframe timing for multiple properties or GameObjects.
- Curves mode displays all selected properties appear overlaid within the same graph view.
- We won’t be using Curves mode much in this guide, but for more information, check the official Unity Documentation.
Keyframing Animation Properties
Adding Animation Properties/Keyframes
There are four main ways to add properties to any Animation Clip.
1. Record is probably the fastest way of animating properties
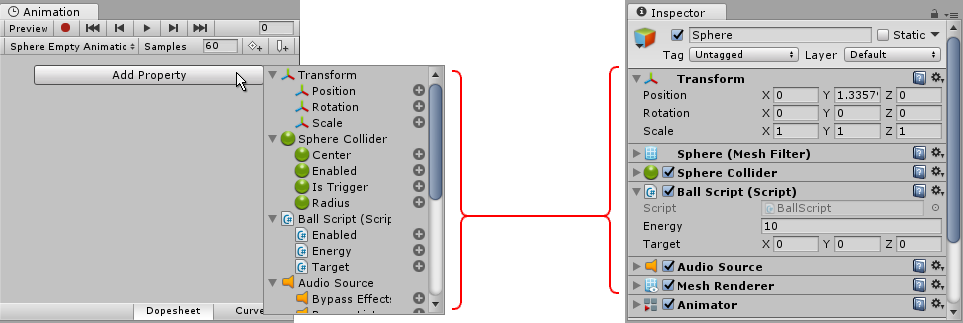
![]()
- Manually Click Add Property at the bottom of the Animation Property list to pop up a list of animatable properties
Right-Clickthe property label of the property you’ve modified while in Preview mode
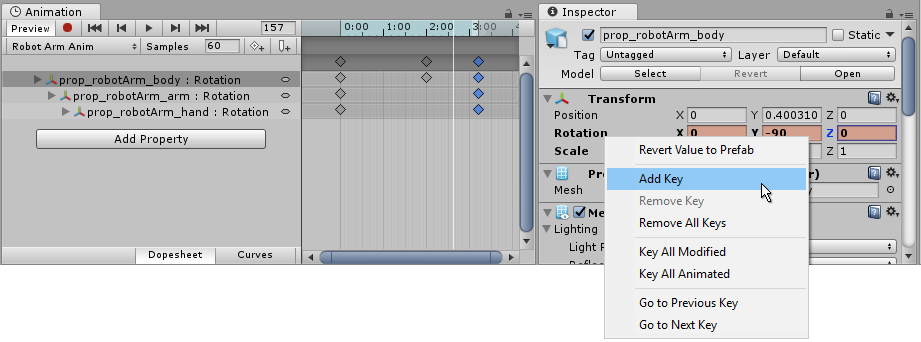
-
Add a keyframe by clicking the Add Keyframe button in the Animation window
a. Requires existing property to be selected first

Example Animation Clip
Example: Quickly Creating a 360 Spin Animation
Setting Keyframe Tangents
When keyframes in a timeline have different values, the animation will try to blend/interpolate in between the values. This is considered the Animation Curve. How that blending behaves can be controlled pretty precisely.
Every key has two tangents that determines how the value of that key is entered and exited: the left-incoming slope and the right-outgoing slope.
By Right-Clicking a key, you can reveal tangent options. You can also use Ctrl + A to select all keyframes at once.
| Clamped Auto | Default: Automatically sets curve to pass smoothly |
|---|---|
| Auto | Legacy version of Clamped Auto for Backwards Compatibility. Use Clamped Auto instead. |
| Free Smooth | Freely set tangents, but left/right are locked to be co-linear to ensure smoothness |
| Flat | Tangents are flat/horizontal |
| Broken - Free | Broken lets you set separate left/right tangents. Freely set tangents. |
| Broken - Linear | Blend linearly to next keyframe |
| Broken - Constant | Retain value until next keyframe |
Ctrl + A then Right Click to set all keyframes’ tangents at once
Take the previous example animation clip and compare the following Clamped Auto vs Broken - Linear tangent modes
Cube spinning 360 degrees with animation curve set to Clamped Auto
Cube spinning 360 degrees with animation curve set to Linear
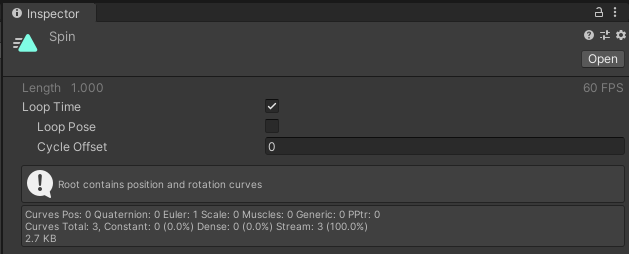
Animation Clip Settings
Loop Time
Indicate whether or not this animation clip should loop upon reaching the end of the timeline.
Loop Pose
Indicate whether or not this animation clip should add an extra keyframe between the first and the last when looping to make the looping seamless.
Cycle Offset
How far into the animation clip the animation clip should start playing. If this is set to 0.5, it will start playing halfway through.
Animation Clip Settings
The other settings on an Animation Clip’s Inspector are less commonly used, and often don’t appear unless you’re dealing with humanoid animations imported from outside of Unity.